
The goal for this stage of development is to get our C# project listed in Jenkins and building. The next iteration will be adding testing.
This step follows the work from CI/CD Scanning GitHub for Repositories from Jenkins, where Jenkins is set up to scan for projects, but it now needs the files required to build.
Updating the Visual Studio Project
First, we’ll open our Visual Studio project, then right-click on the solution and choose ‘Add’, then ‘Add New Item’:
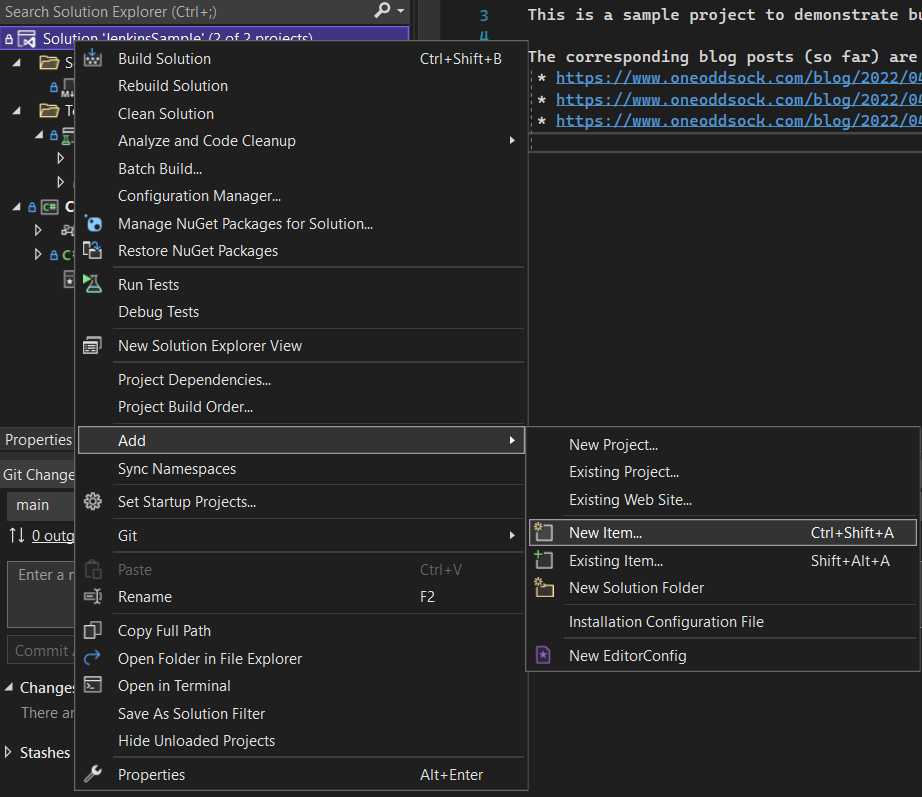
Select Text File for type and name the file Jenkinsfile.groovy.
To ensure Jenkins will pick up and work, we’ll add some basic Jenkins pipeline code to verify Jenkins. Then we can build from there.
In the Jenkinsfile.groovy, you can add the following text:
pipeline {
    // Run on any available Jenkins agent.
    agent any
    options {
        // Show timestamps in the build.
        timestamps()
        // Prevent more than one build from running at a time for this project.
        disableConcurrentBuilds()
        // If Jenkins restarts or the client disconnects/reconnects, abandon the current build instead of trying to continue.
        disableResume()
    }
    triggers {
        // Poll source control periodically for changes.
        pollSCM 'H * * * *'
    }
    stages {
        stage('This is a test!') {
            steps {
                script {
                    print 'Hello World!'
                }
            }
        }
    }
}
Then save the file and the solution, commit it and push the changes to GitHub!
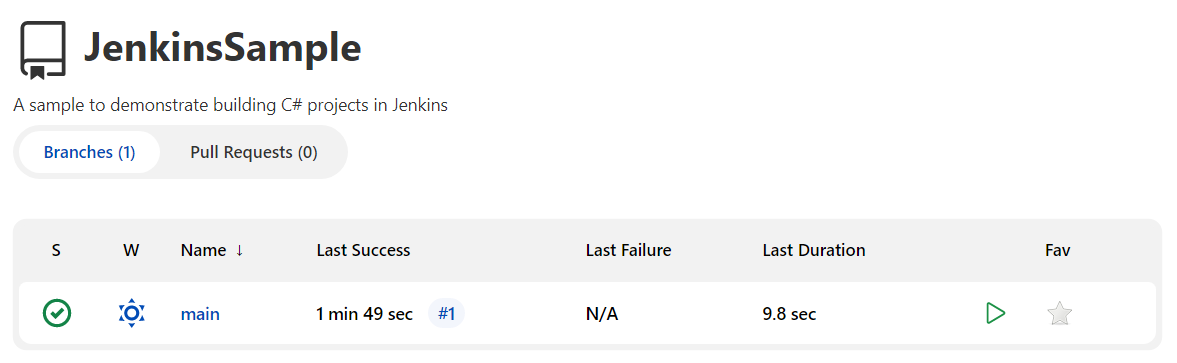
If the period for querying for builds in Jenkins is set to a large enough value, you may either reduce the interval for updating while working on the project or explicitly choose the option to ‘Scan Organization Now’. Your project should appear now in the list:

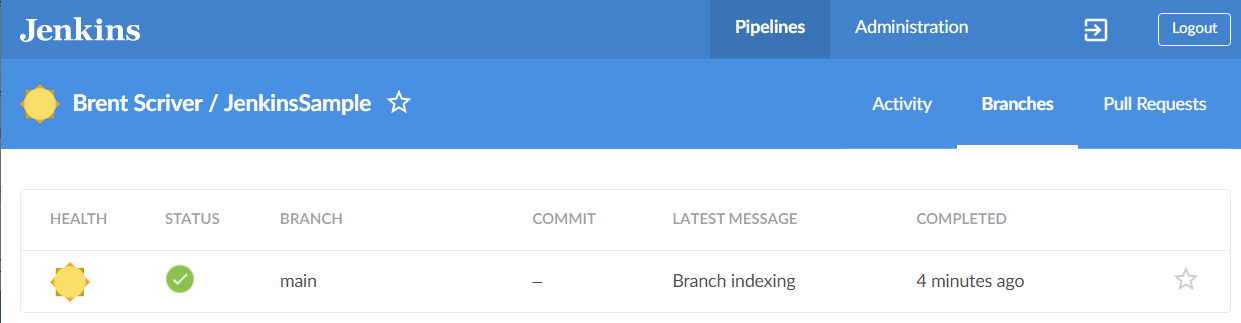
If you click on your project you should have an entry for your primary branch:
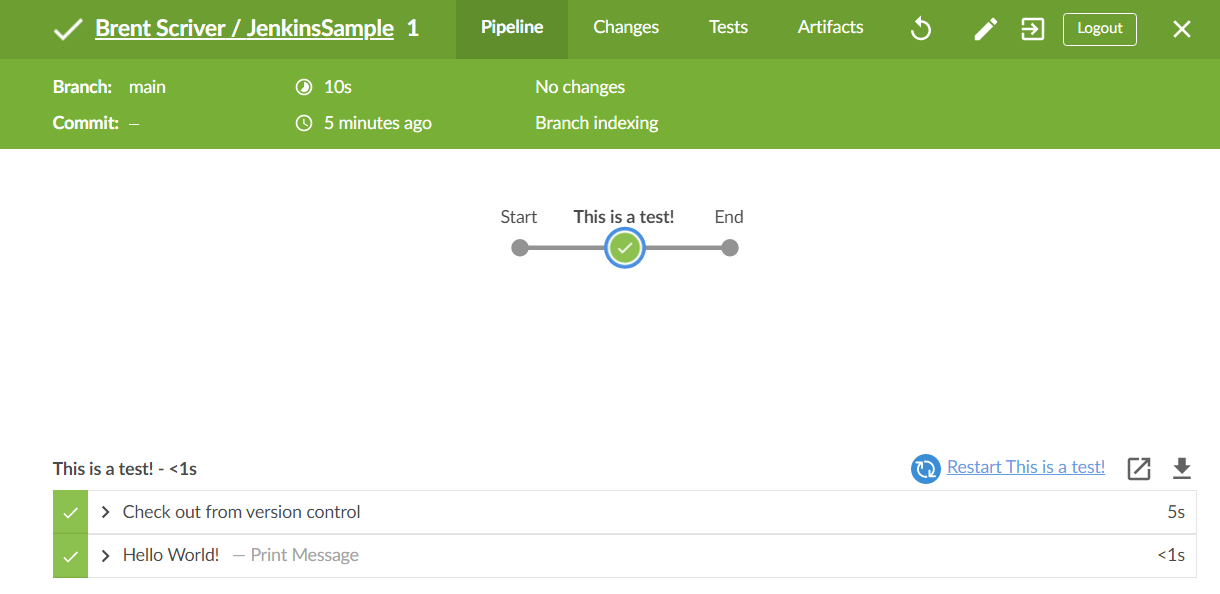
Selecting ‘main’ will give you a list of builds that have occurred. If you switch to the Blue Ocean build view (on the right-hand side you ought to get a list that looks like this:
Click on the entry, and you will see the first run of your Jenkins job:
Now that we have established we can run the script from the project in Jenkins, it is time to get the code to build!
Building The Project
Install Visual Studio Build Tools
To build the project on Jenkins, Visual Studio needs to be installed, but we don’t need all of it. We only need the Visual Studio 2022 Build Tools installation, which is under ‘Tools for Visual Studio’ and then ‘Build Tools for Visual Studio 2022’.
You’ll need to install all the components your project needs to build (in particular, C#!).
You may need to restart after installation.
Building the Project
All the pieces should now be in place to script building the project. Since we want the script to be generic, we’ll need to do a few steps if we want to repeat this script in other contexts later:
- Find the solution (let’s avoid hardcoding it)
- Run NuGet to restore any missing dependencies
- Build the solution!
The following is an updated Jenkinsfile.groovy that does these three additional steps:
pipeline {
    // Run on any available Jenkins agent.
    agent any
    options {
        // Show timestamps in the build.
        timestamps()
        // Prevent more than one build from running at a time for this project.
        disableConcurrentBuilds()
        // If Jenkins restarts or the client disconnects/reconnects, abandon the current build instead of trying to continue.
        disableResume()
    }
    triggers {
        // Poll source control periodically for changes.
        pollSCM 'H * * * *'
    }
    stages {
        stage('Restore NuGet For Solution') {
            steps {
                //  '--no-cache' to avoid a shared cache--if multiple projects are running NuGet restore, they can collide.
                bat "dotnet restore --nologo --no-cache"
            }
        }
        stage('Build Solution') {
            steps {
                bat "dotnet build --nologo -c Release -p:ProductVersion=1.0.${env.BUILD_NUMBER}.0 --no-restore"
            }
        }
    }
    post {
        cleanup {
            cleanWs(deleteDirs: true, disableDeferredWipeout: true, notFailBuild: true)
        }
    }
}
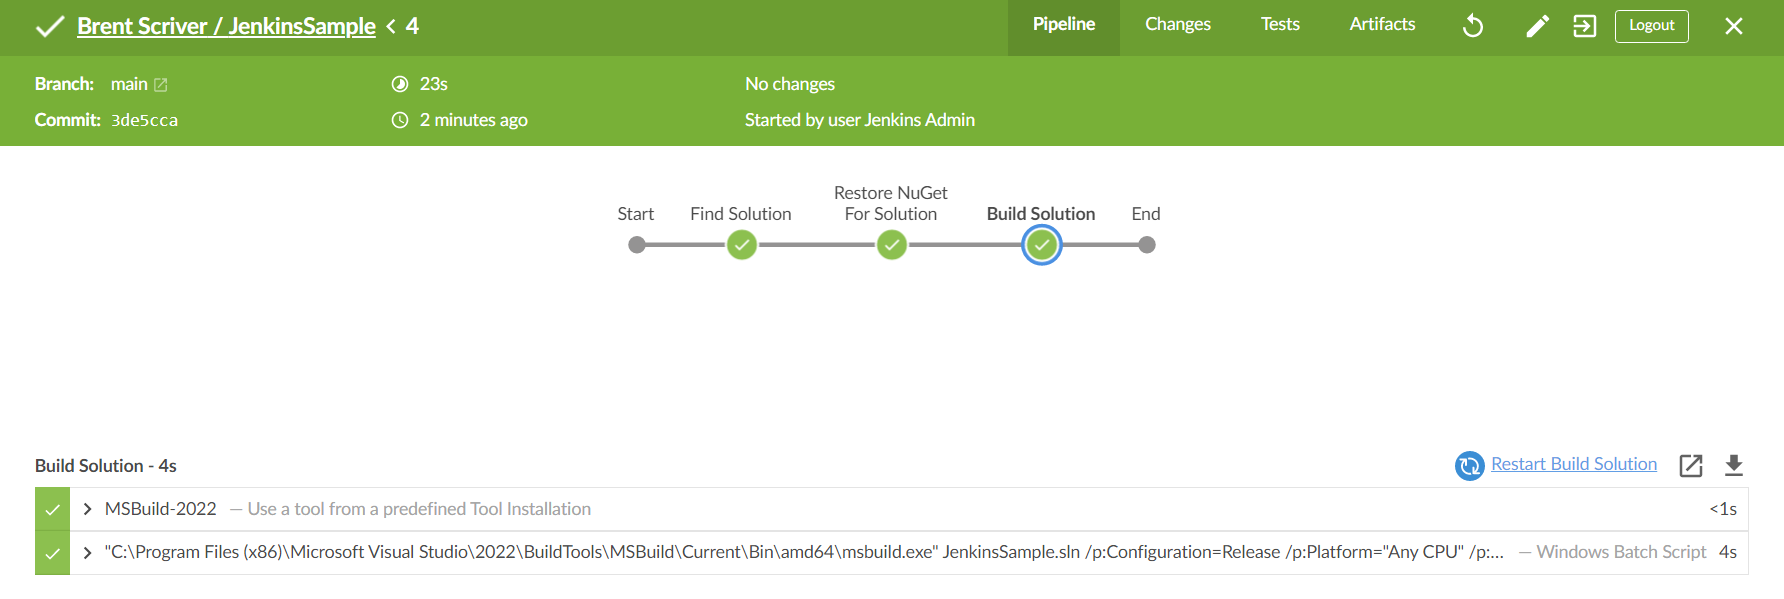
After updating, committing, and pushing back to GitHub, a Scan in Jenkins should result in a successful build:
Note: At the end of the script, in the ‘post’ section, I have added a cleanup step to clean the workspace of files. This ensures that when we switch to doing development in branches instead of directly in the main branch, those branches aren’t going to accumulate on the hard drive taking up space.
Pingback: CI/CD Revisions! | Brent Scriver